First of all, I'd like to thank you for choosing to purchase the Awwal Blog Theme. We appreciate your decision to invest in our product and hope that it meets your blogging needs. We assure you that our team has put in a lot of effort to develop a blog theme that is both easy to use and packed with features that will help you create a unique and functional blog. We are confident that it will exceed your expectations, and we look forward to providing you with outstanding customer support as you embark on your blogging journey.
This guide covers the basic theme setup process.
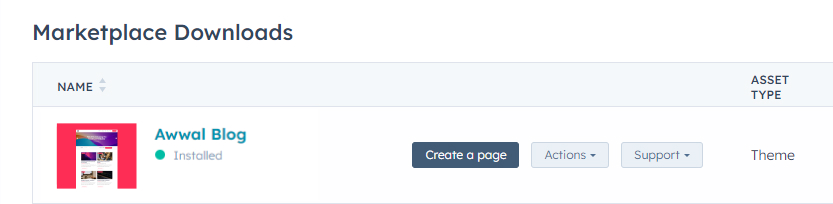
After you've purchased and installed the blog template, it will automatically be added to your HubSpot account.
You should be able see it under the Settings > Marketplace Downloads
Before we begin setting up the blog we need to create a child theme to not affect the original theme.
1. Let's create a child theme
What is a child theme?
In essence, a child theme is a way to customize the Awwal theme by creating a separate version that can be edited at the code level, while still taking advantage of any future updates to the Awwal theme.
A child theme inherits the functionality and styling of a main theme, known as the parent theme. The child theme allows you to make modifications to the parent theme's code without affecting the original code. This means that you can customize the look and feel of your blog website without losing the ability to update the parent theme.
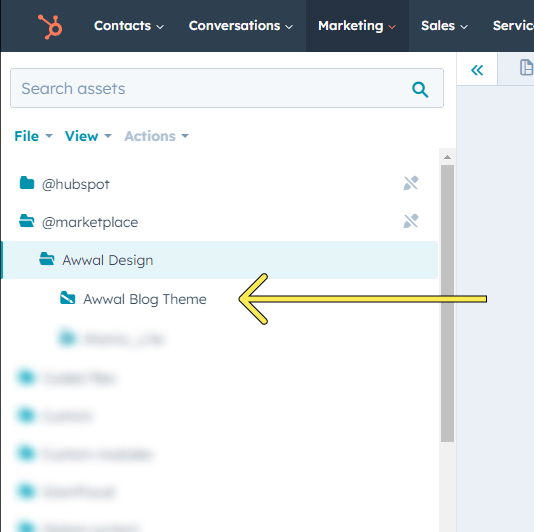
First let's find the main theme. You can find it under Marketing > Files and Templates > Design Tools.
In the left sidebar look for a folder called @marketplace (this should be right at the top)
Under it, open the folder "Awwal Design" and select "Awwal Blog theme"
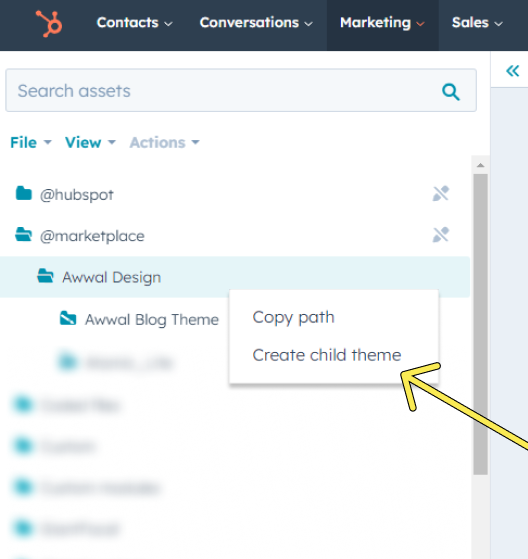
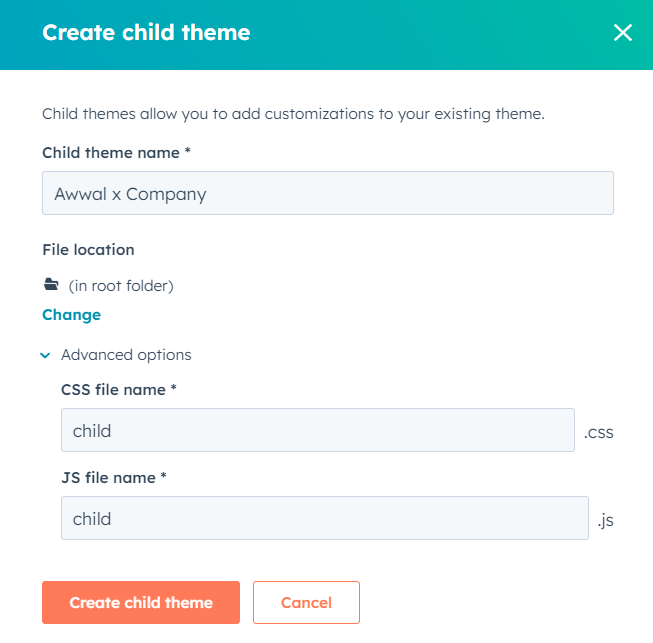
Now right click on the Awwal Blog Theme and click Create child theme
It's recommended to Name it Awwal X Your Company Name, so you can easily find it later on while create a blog.
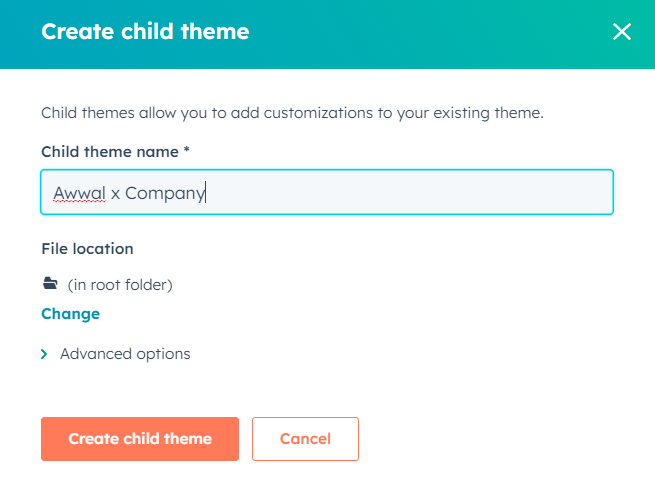
If you'll be doing any advanced changes you can also name your child CSS and JS files, for now let's keep the default one.
Click Create and wait for a few seconds until you see the this message.
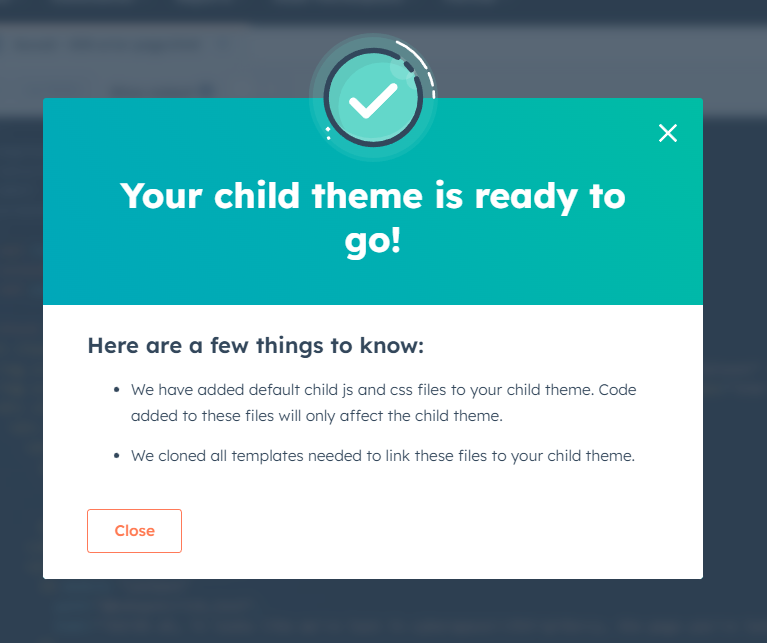
Once it's finished you should have a folder structure that looks like this.
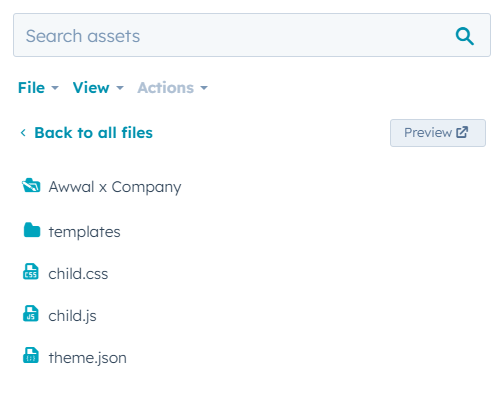
Amazing! We've created a child theme now you can use this child theme to create blog or pages.
2. Let's setup the blog using this child theme
▶ For users who already have blog in HubSpot
In you already have a blog inside HubSpot follow this method. For new users see this section.
Step 1)
To start using your new templates you need to replace the default blog template with the new one. To change your blog template, follow the steps below:
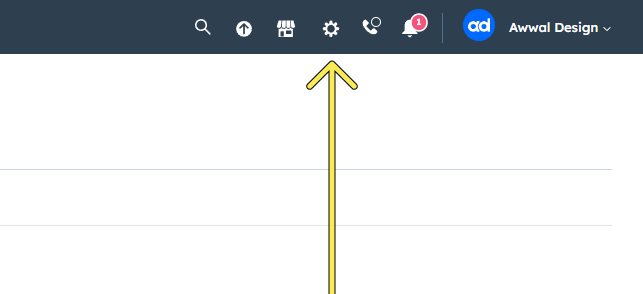
a) Go to your Settings by clicking on the gear icon on top right of your navigation bar.
b) In the left sidebar menu, navigate to Tools > Website > Blog.
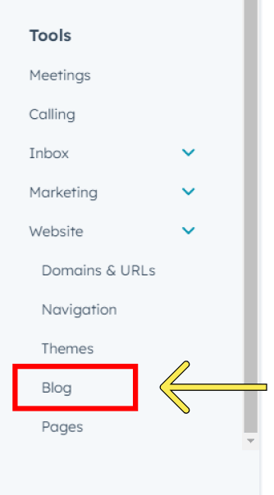
c) Go to the "Templates" tab
Step 2)
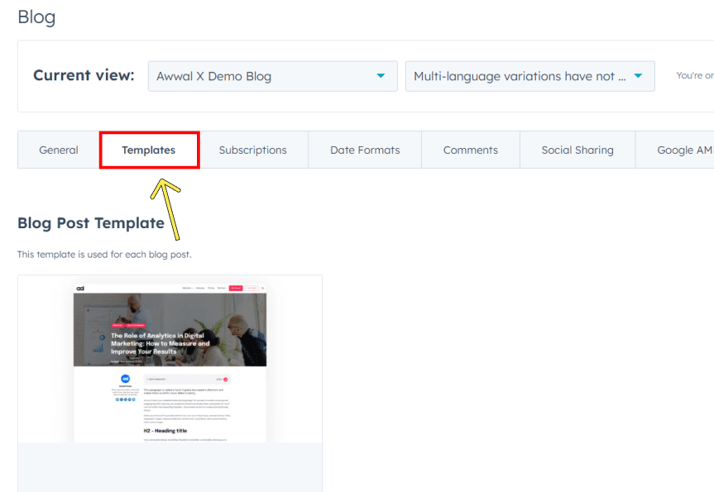
At the top of the page, under 'Select a blog to modify,' select the blog that you'd like to change the template for within the drop down menu. For this demo I'm using a demo blog.

Step 3)
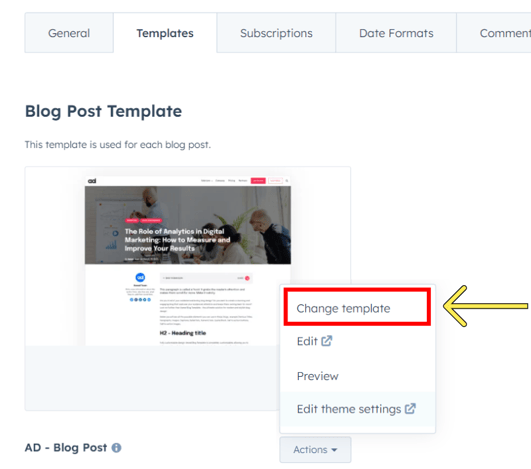
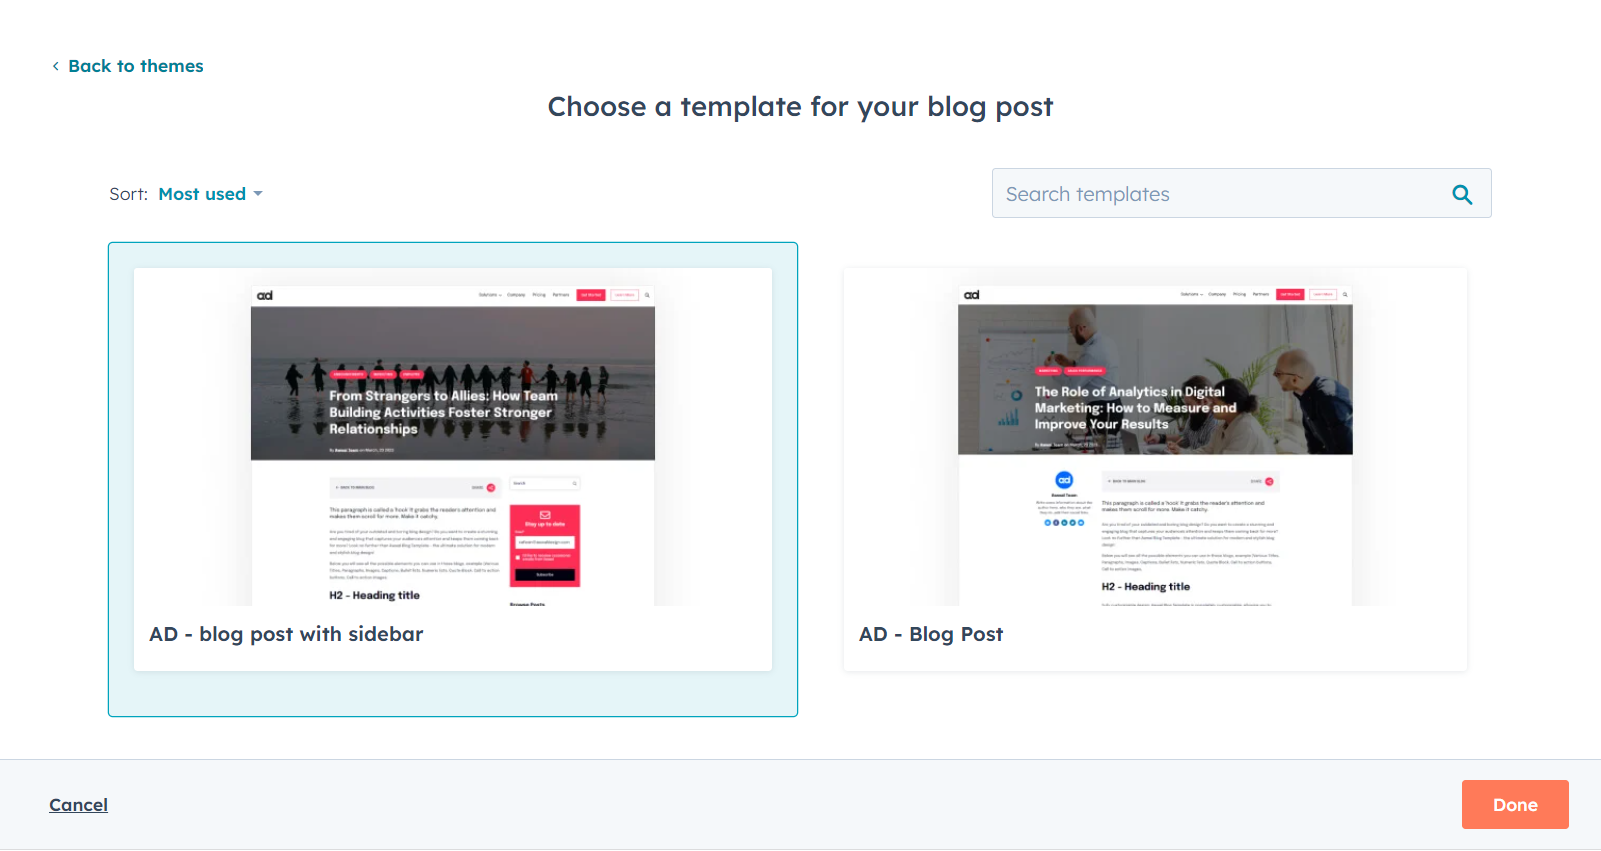
a) Scroll down to the 'Blog Post Template ' section, click Action and select Change Template
b) Choose Awwal Blog theme
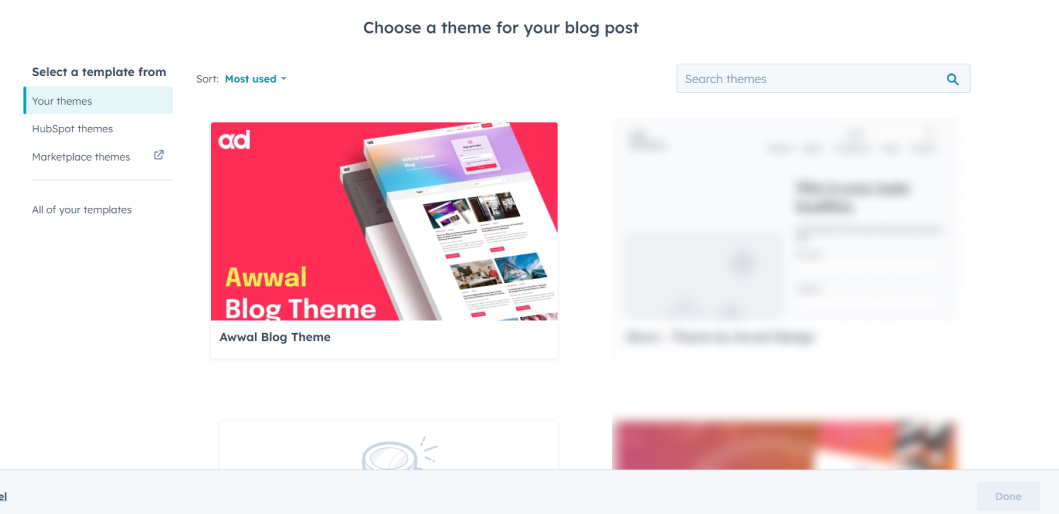
c) Now choose a blog post template. You have two version available... with Sidebar and without the sidebar. Choose whatever you prefer. I'll go with simple blog post (without sidebar)
When you're ready Click Done and you've just selected the post template.
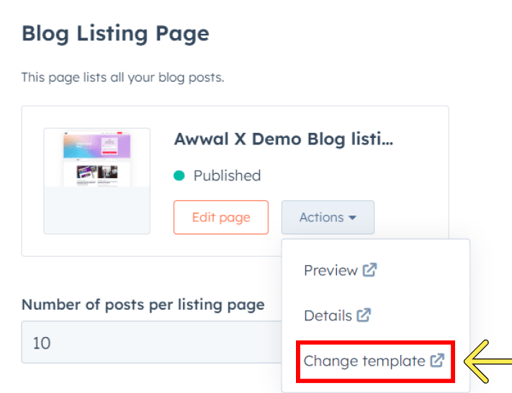
b) Scroll down further and to the 'Blog Listing Page ' section, click Action and select Change Template.
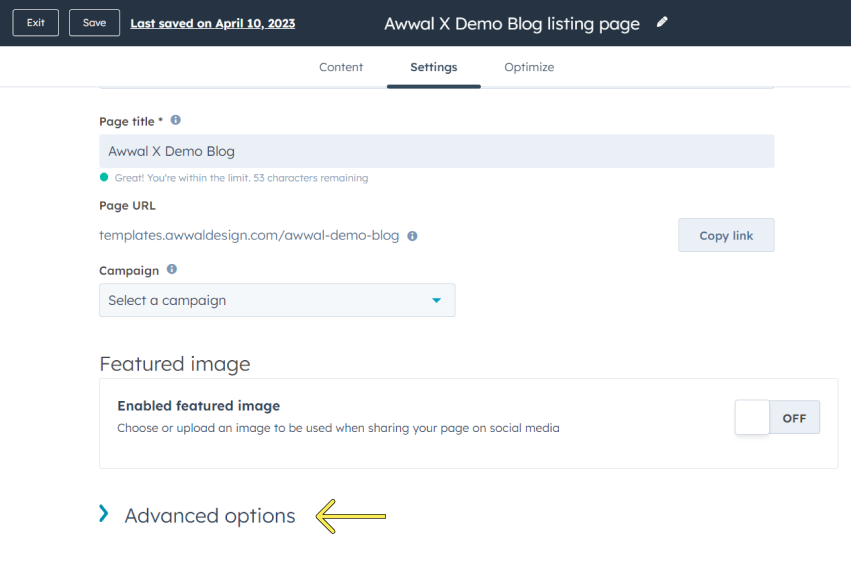
c) You should get redirected to the listing page. At the bottom, click advanced options
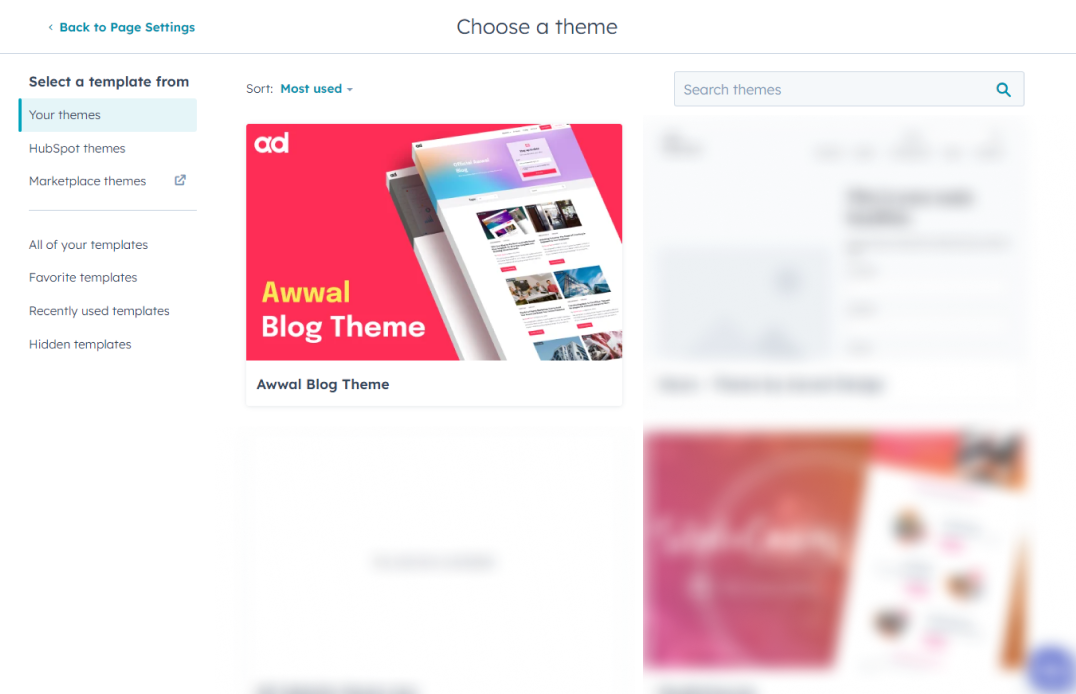
d) Scroll down to the Template section and click Use different template

e) Choose Awwal Blog Theme.
Scroll down further and to the 'Blog Listing Page ' section, click Action and select Change Template.
Step 5)
Now let's check how our blog is coming along!
Go to Marketing > Website > Blog
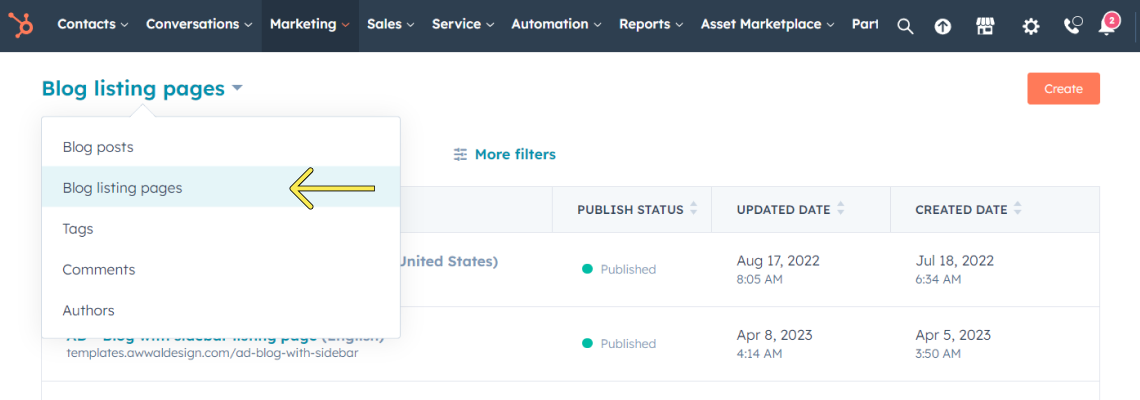
From the top dropdown choose Blog Listing Pages.
Find the blog we just created, hover over it click View.
All your Topics and previous articles should automatically be moved to the new template.
Great! You are done with the basic setup.
▶ For new users who don't have a blog in HubSpot
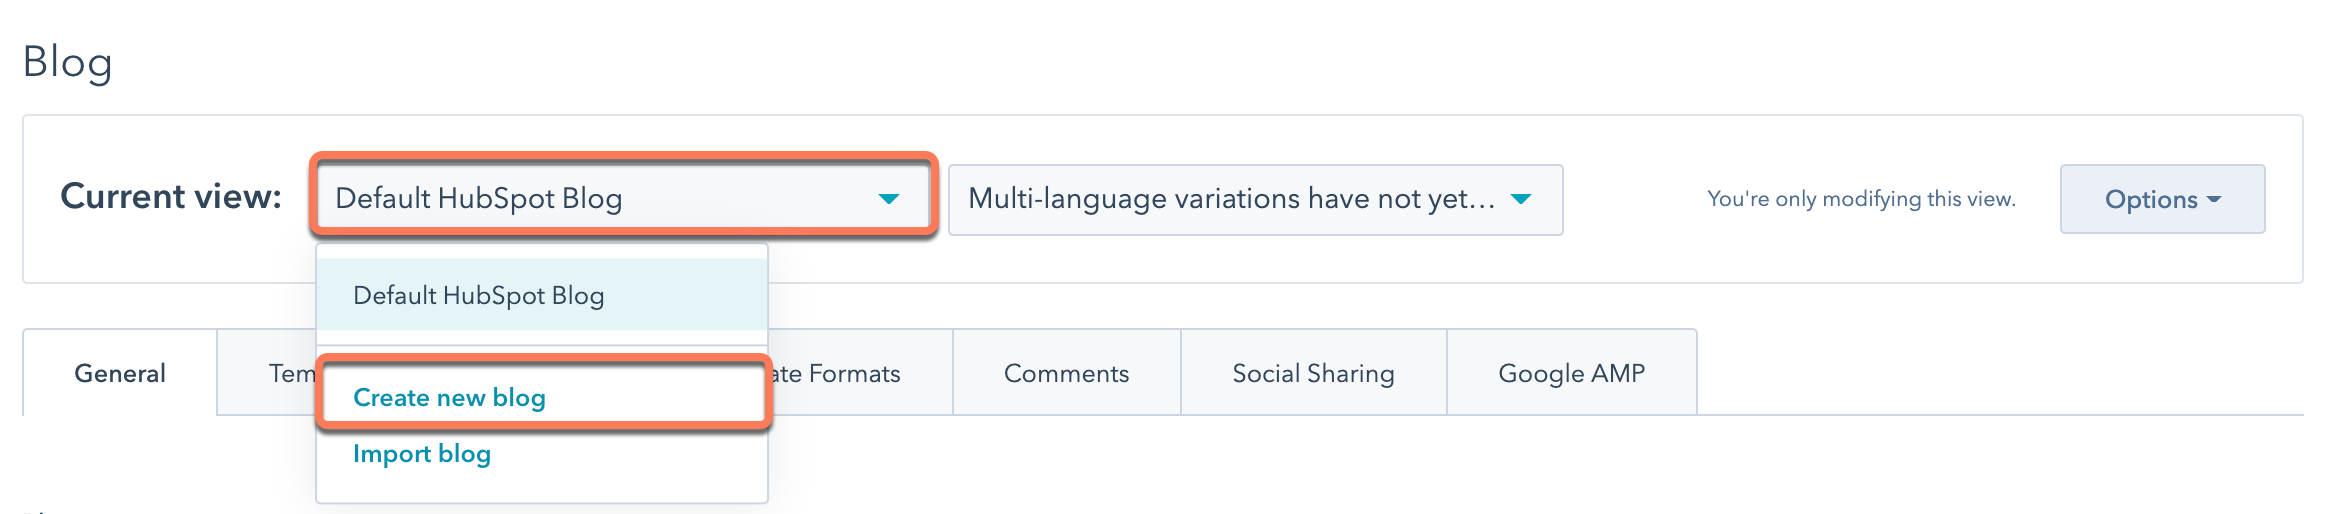
a) In your HubSpot account, click the settings icon in the main navigation bar.
b) In the left sidebar menu, navigate to Tools > Website > Blog.
c) In the Current view section, click the first dropdown menu and select Create new blog.
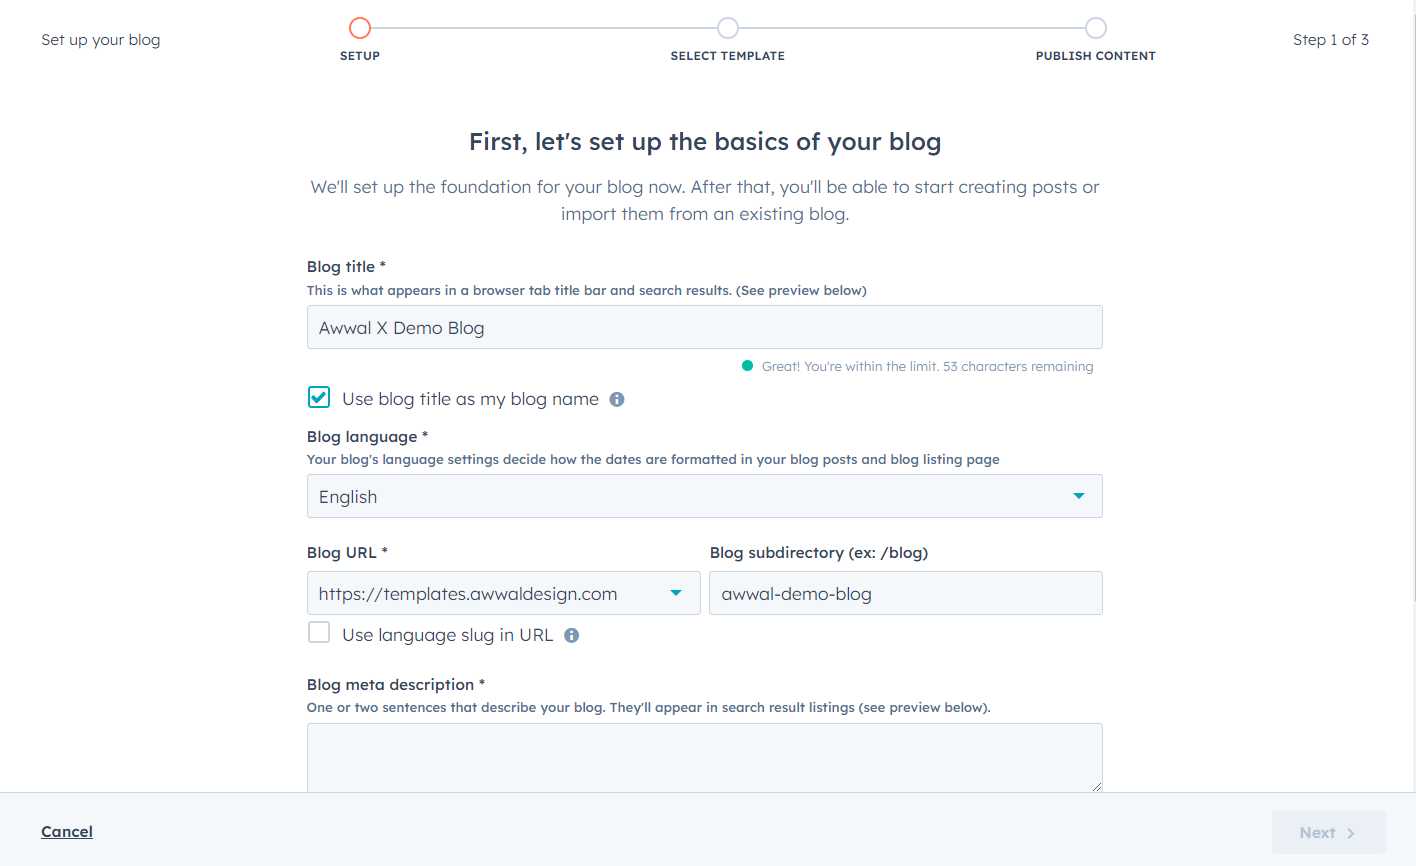
d) Give your blog a a name and add a URL. For this demo, I'll name it Awwal X demo blog
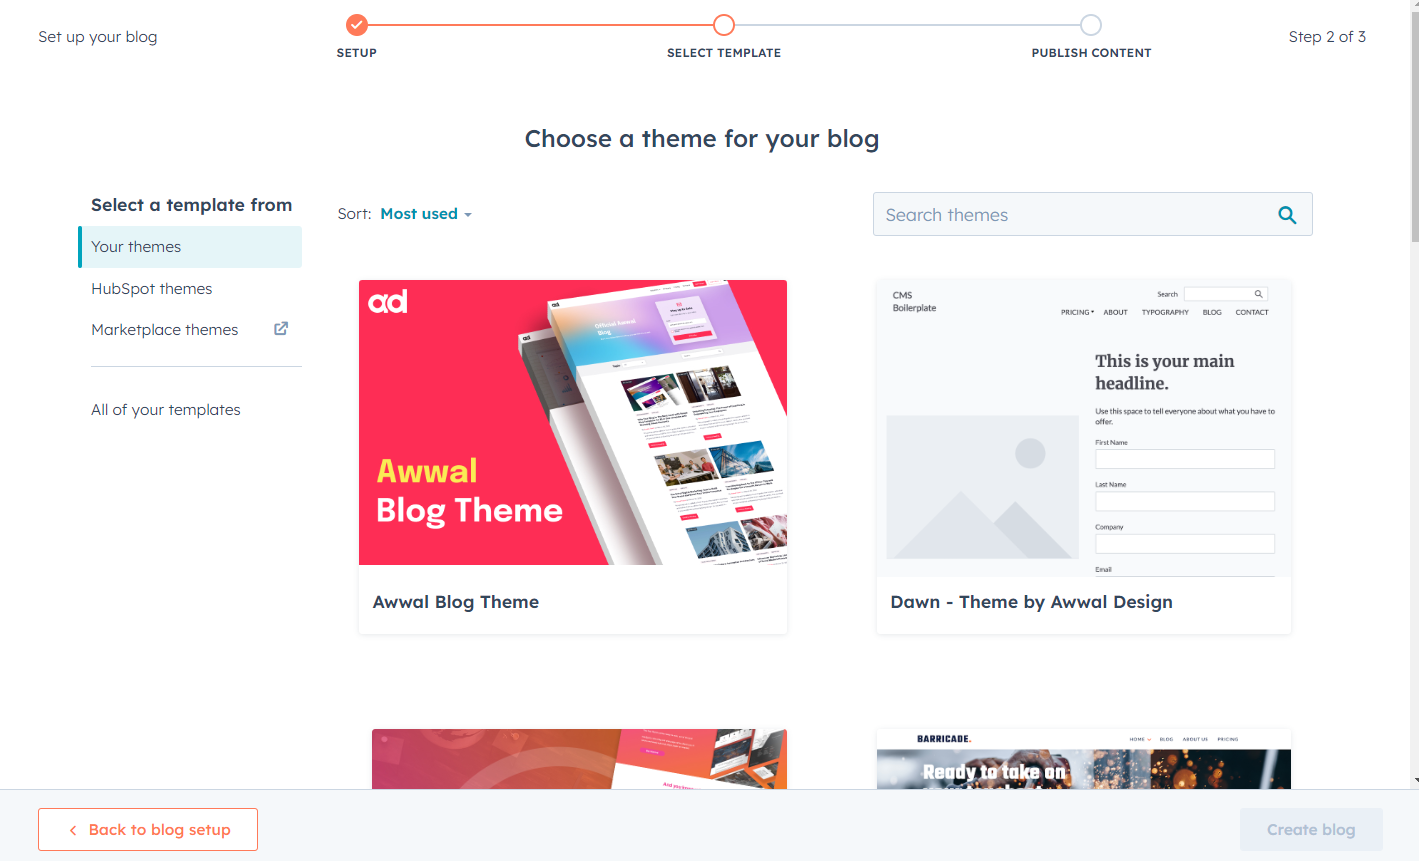
e) In the bottom right, click Next to select a Awwal Blog Theme and click Create Blog.
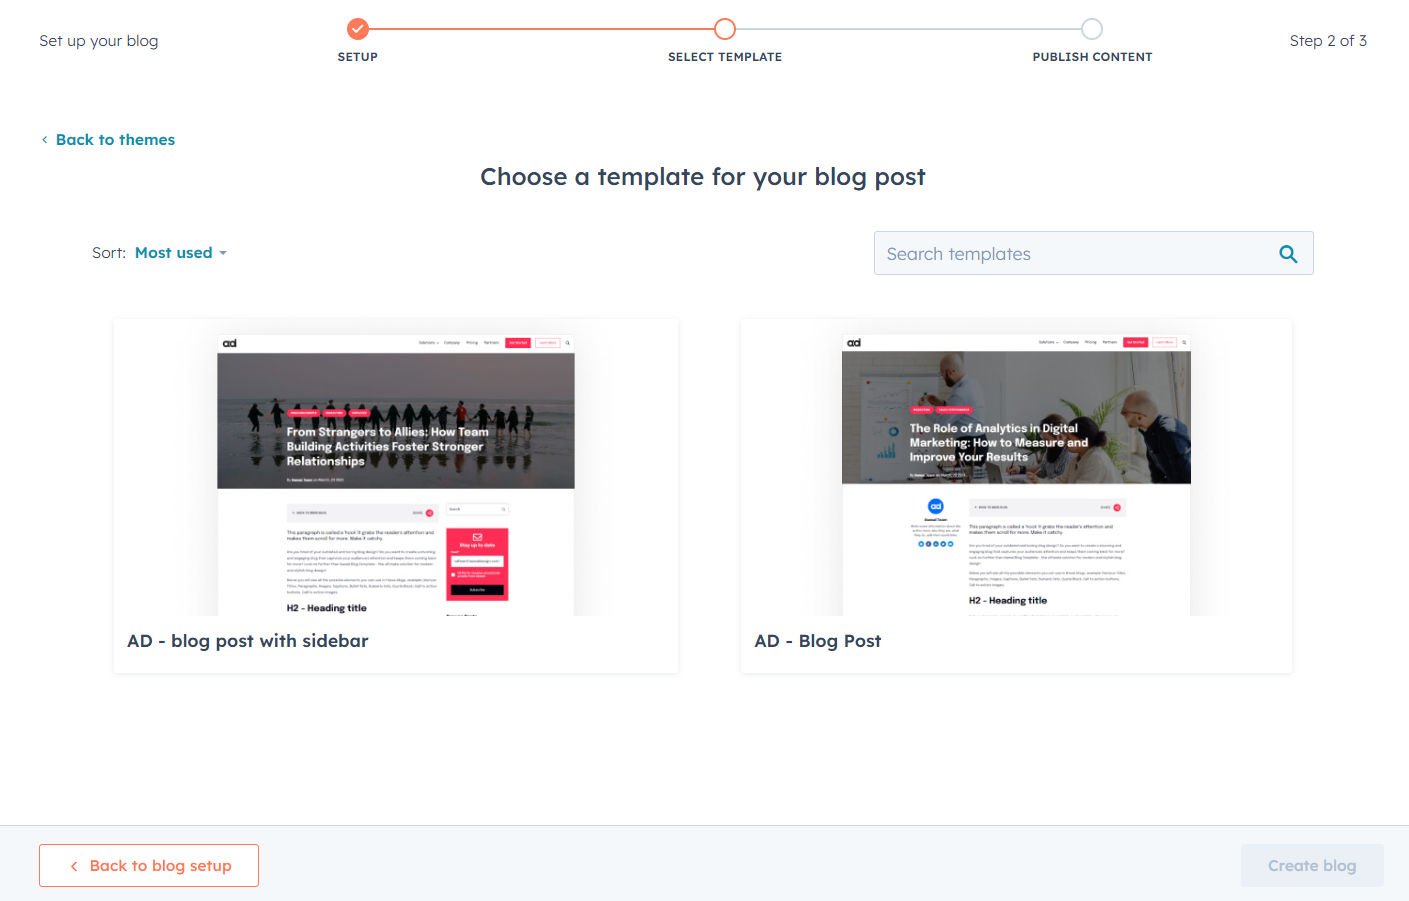
f) Let's choose a blog post template. You have version available... with Sidebar and without the sidebar. Choose whatever you prefer. I'll go with simple blog post (without sidebar)
g) Now choose the Blog listing template
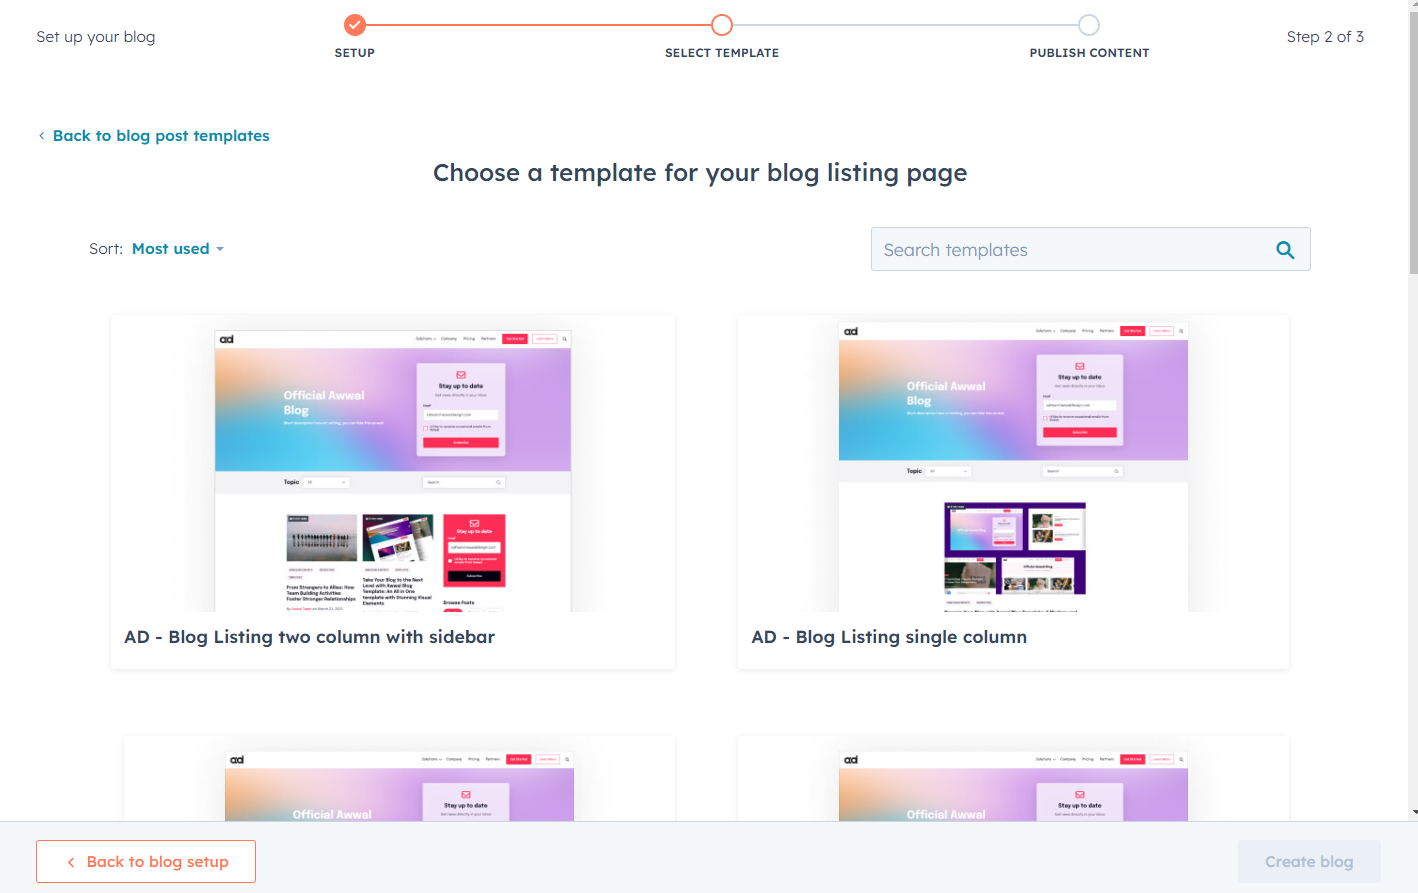
- Blog listing single column
- Blog listing two column
- Blog listing three column
- Blog listing single column (With Sidebar)
- Blog listing two column (With Sidebar)
- Blog listing three column (With Sidebar)
- Blog listing horizontal style
- Blog listing horizontal style (With Sidebar)
- Blog listing option two (This option has a simple hero banner)
- Blog listing option three (This option shows posts cards in the hero area, you can switch them between popular and recent posts)
h) I'm going with the "Blog listing two column" template, when you're ready click Create Blog
Voila! you just created your blog and setup the theme.
3. Let's view the listing page to see what we have created so far
a) Go to Marketing > Website > Blog
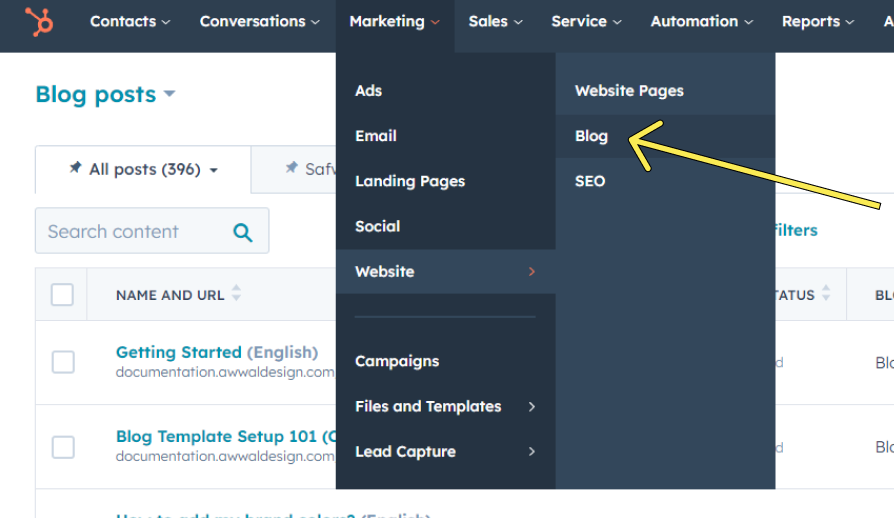
b) From the top dropdown choose Blog Listing Pages.
c) Find the blog we just created, hover over it click View.

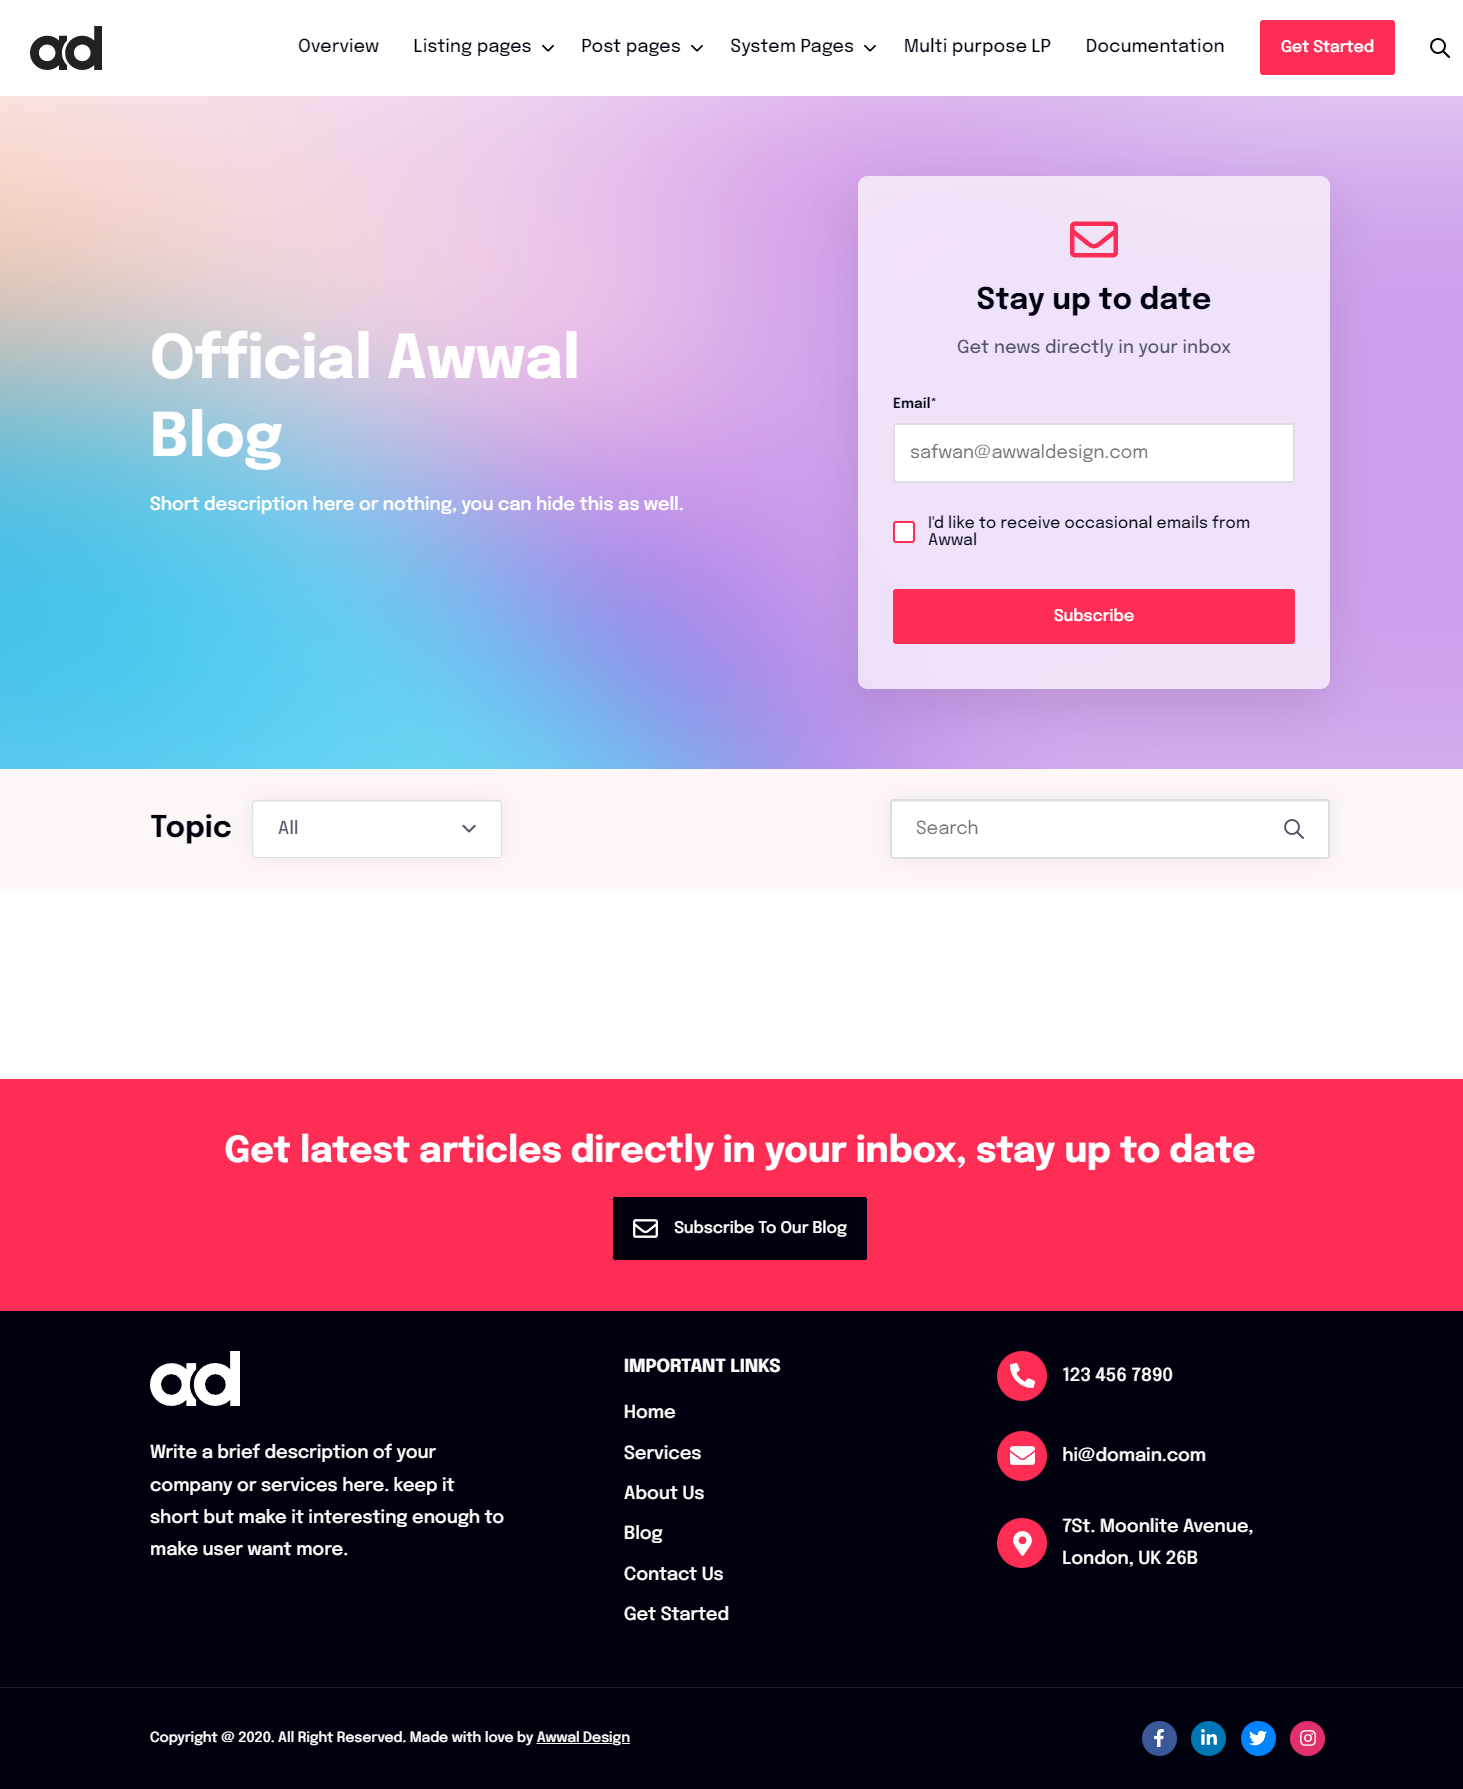
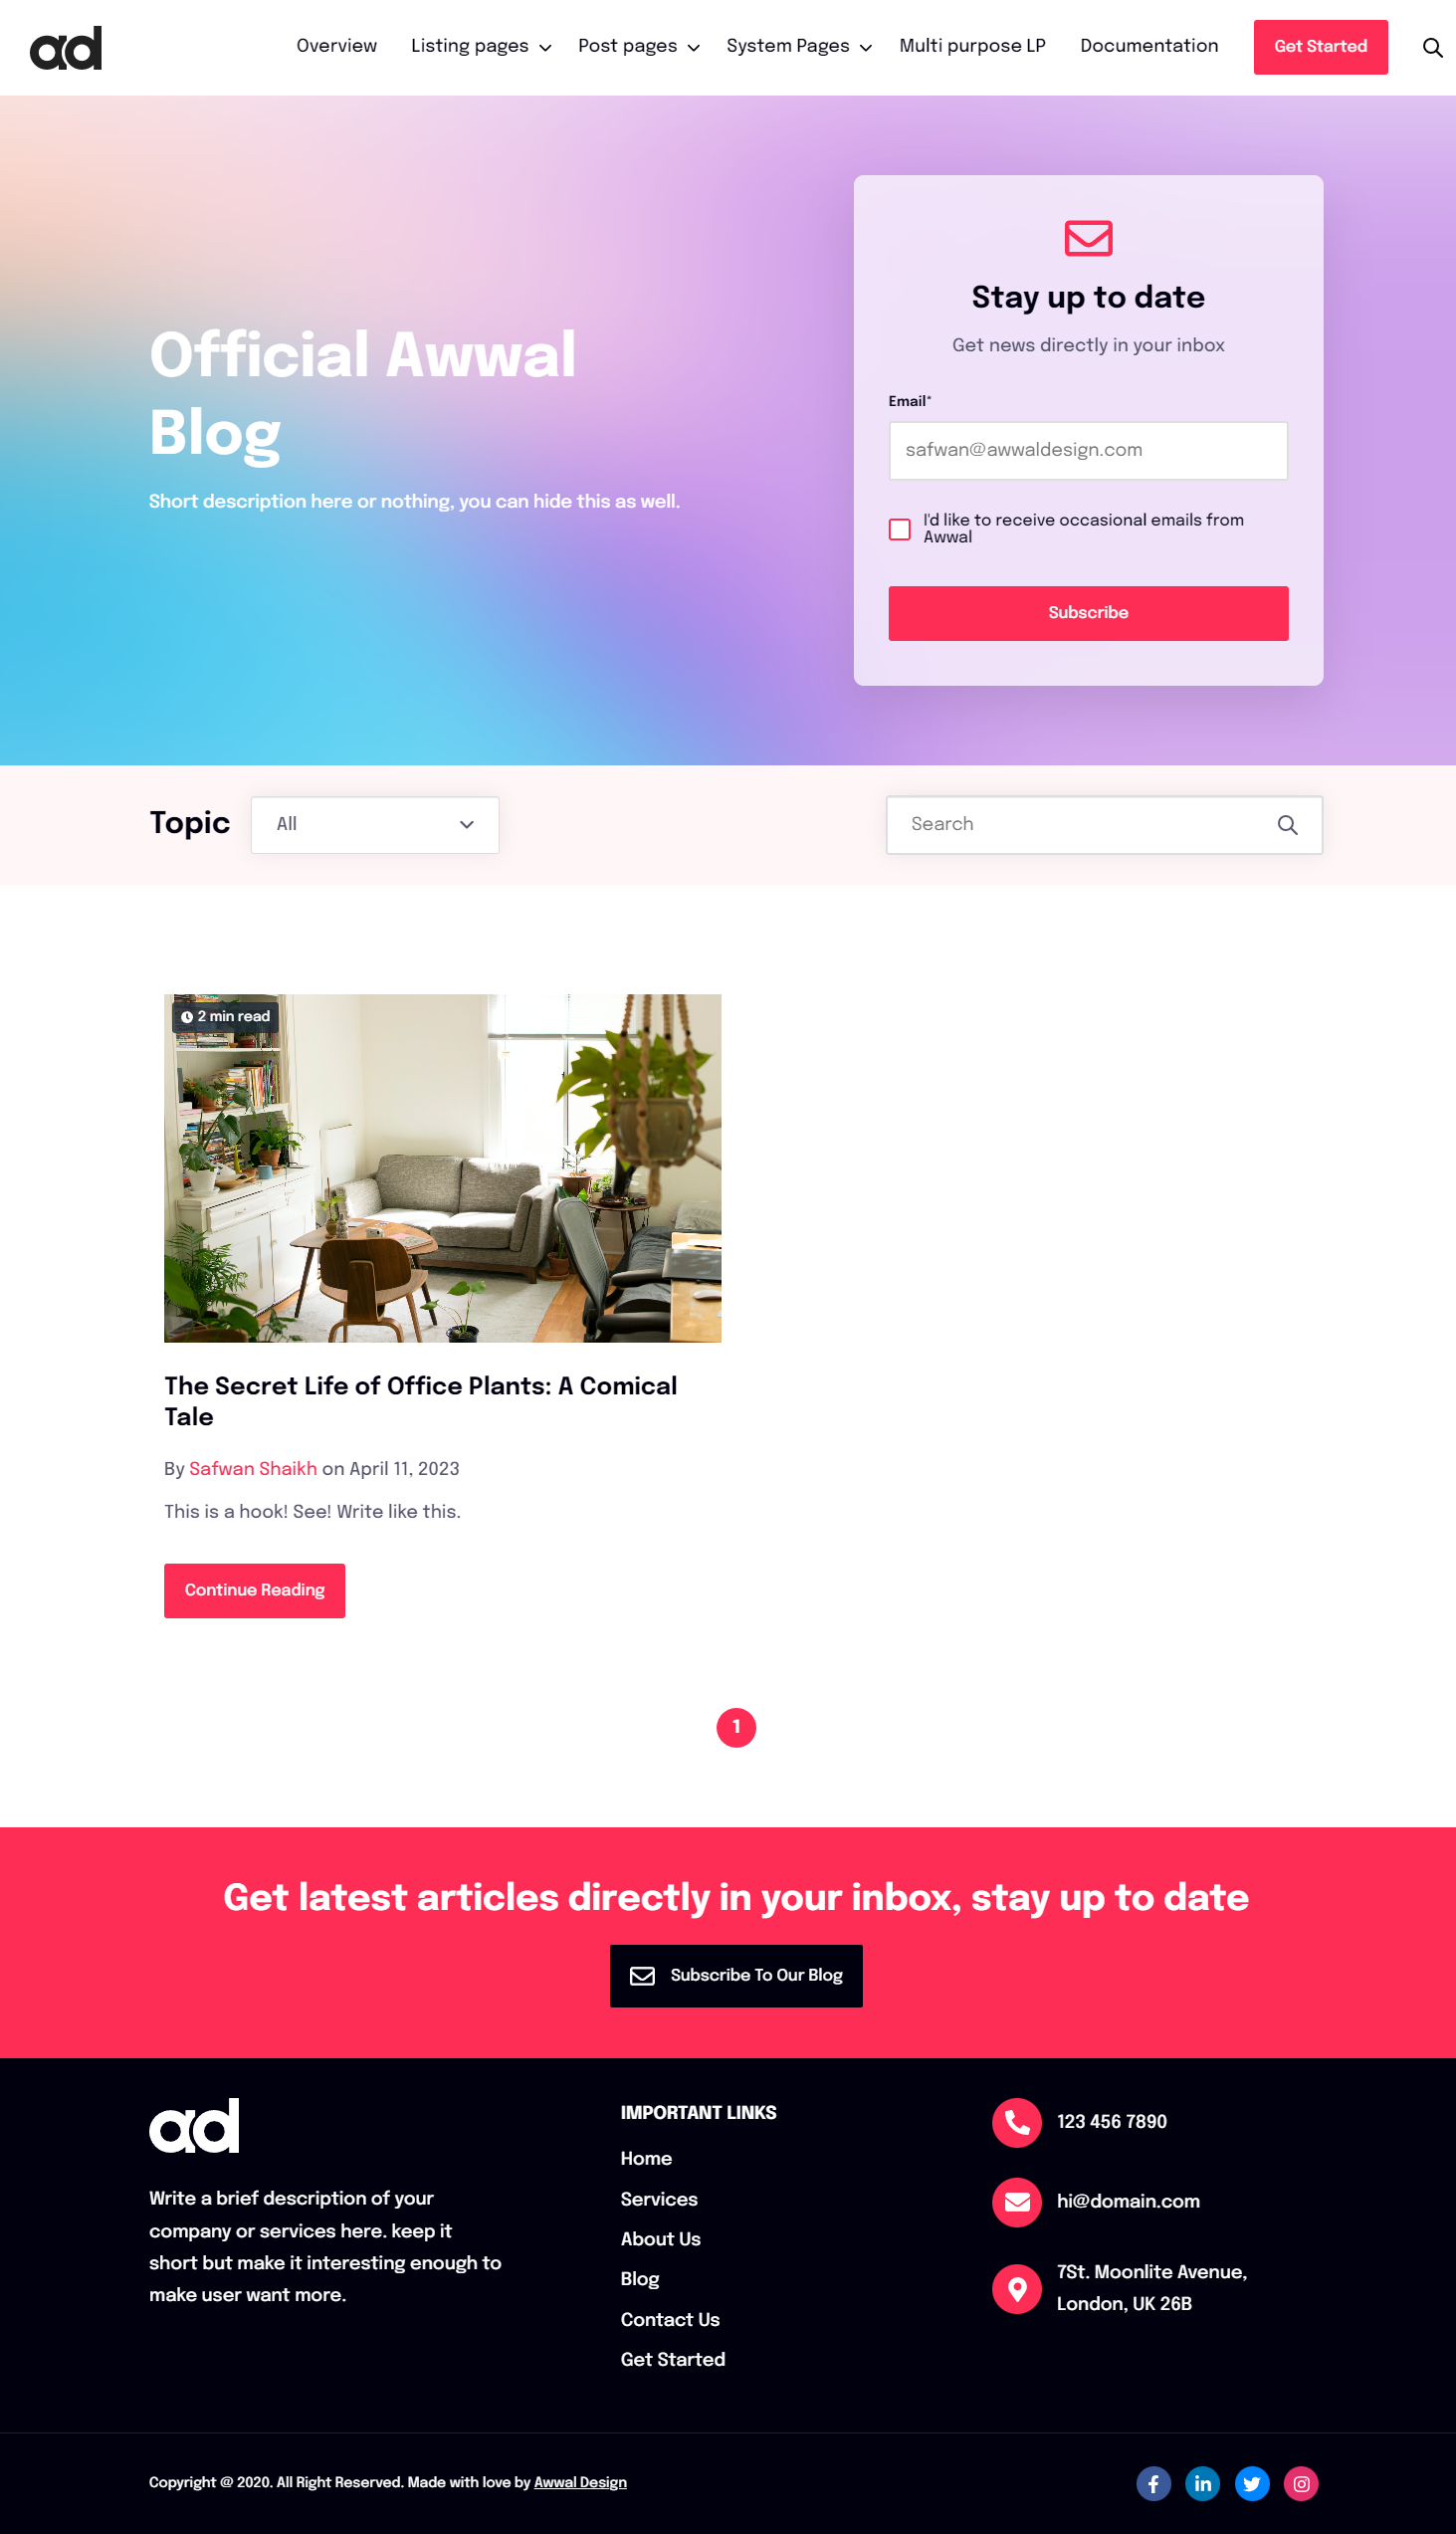
d) Here's our Blog. Looking great! Let's move forward and publish some posts.
4. Let's create blog post.
b) Remember, we already selected the blog post above? That means we're all ready to publish our first post.
For importing all your blog posts see this article.
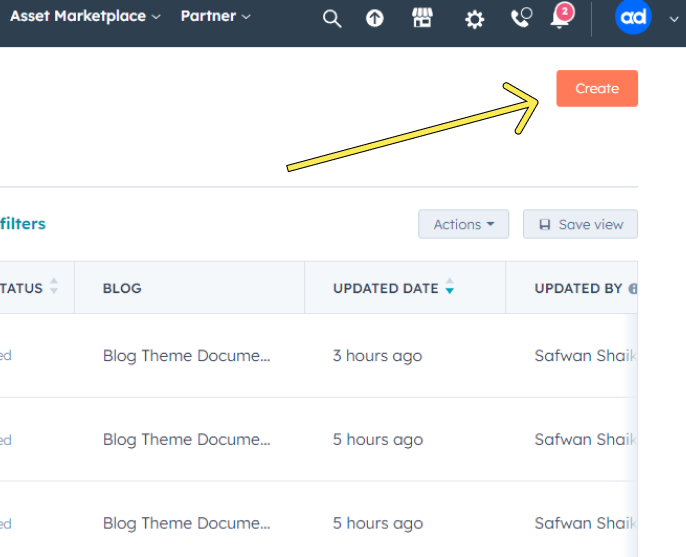
a) Go to Marketing > Website > Blog
b) Click the Create button
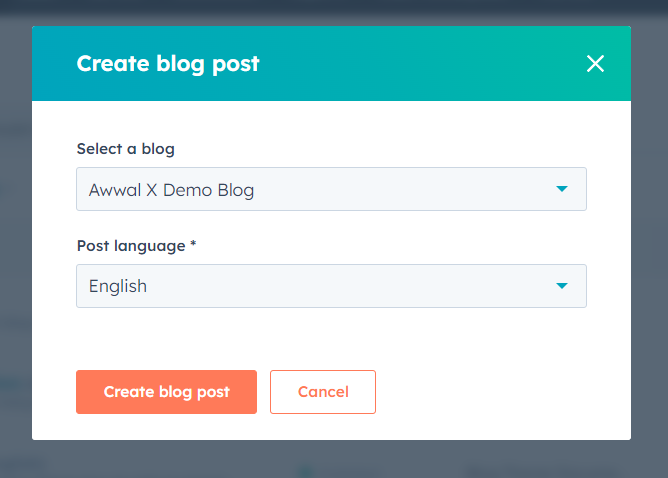
c) Choose the blog you just created from the dropdown, select language and click the orange button. You're ready to roll.
d) You should be able to see this page, it's pretty barren right now but soon we'll spruce it up.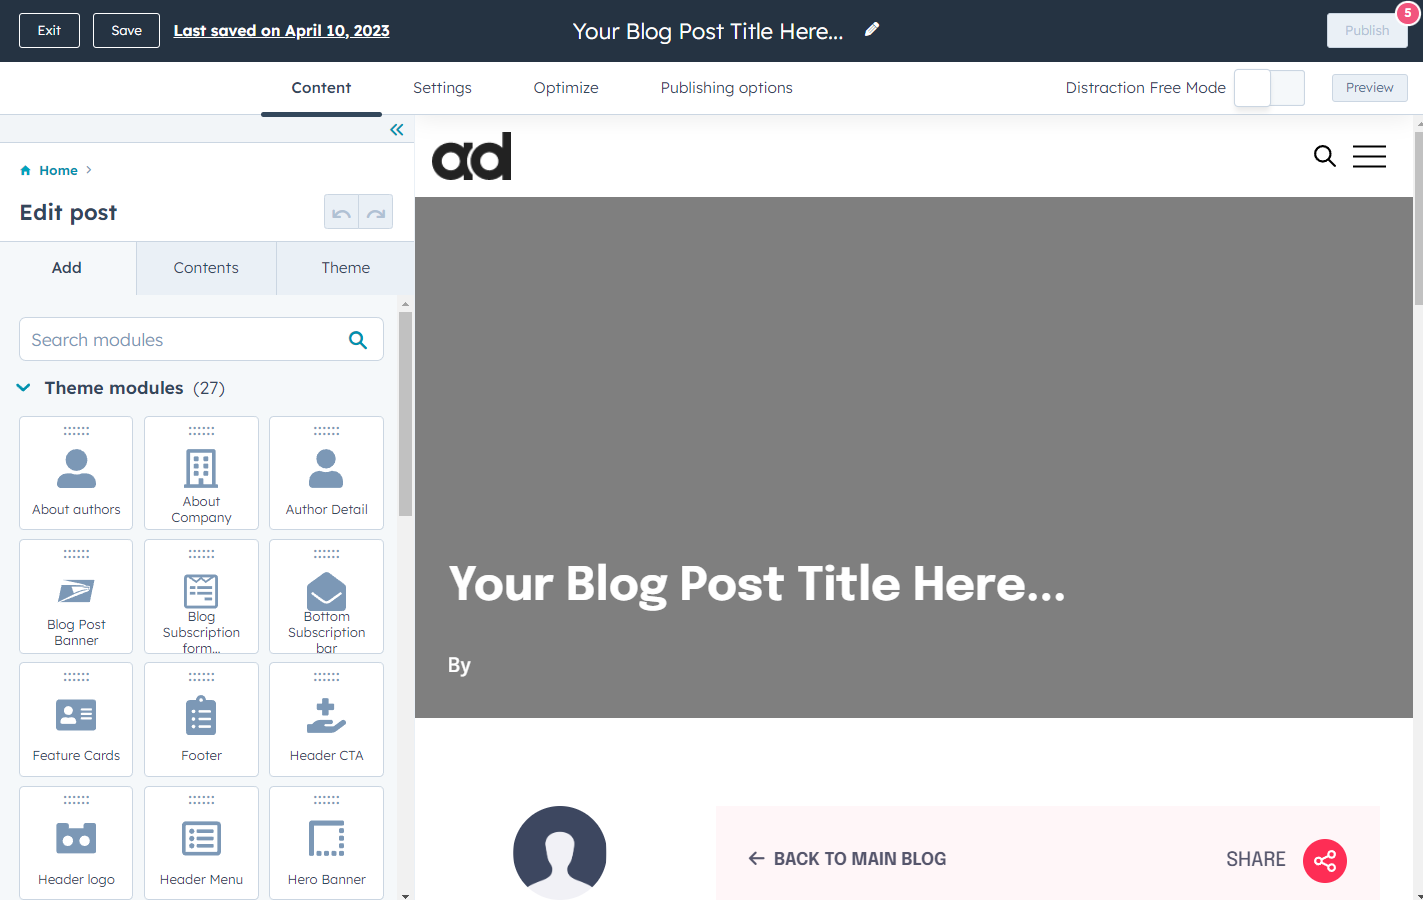
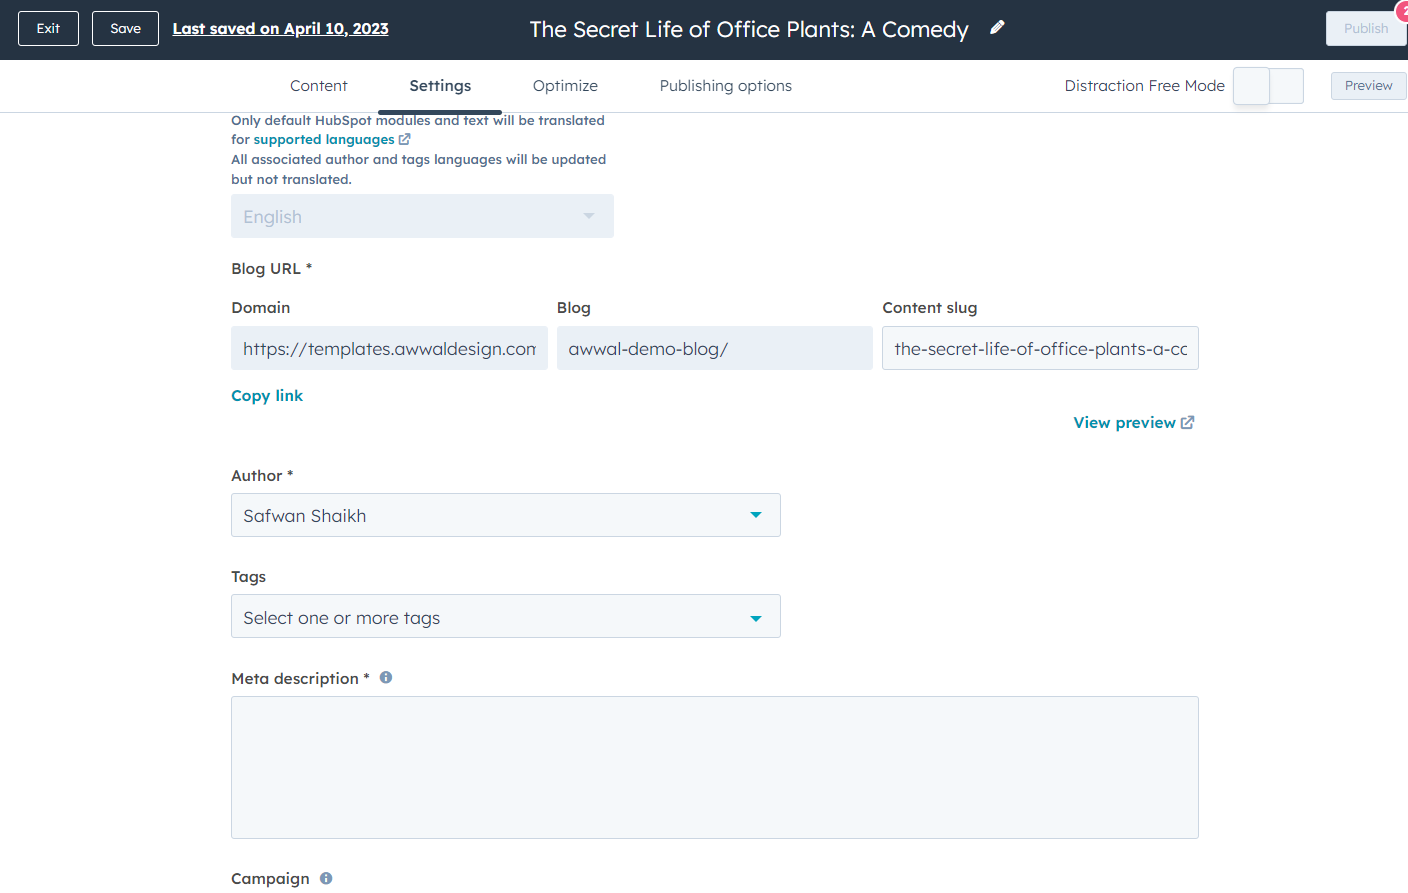
e) Go to Settings and add a blog title, add a proper URL, choose an author, add appropriate tags, add meta description and finally a featured image.
f) Looing better already! Now start adding your blog copy
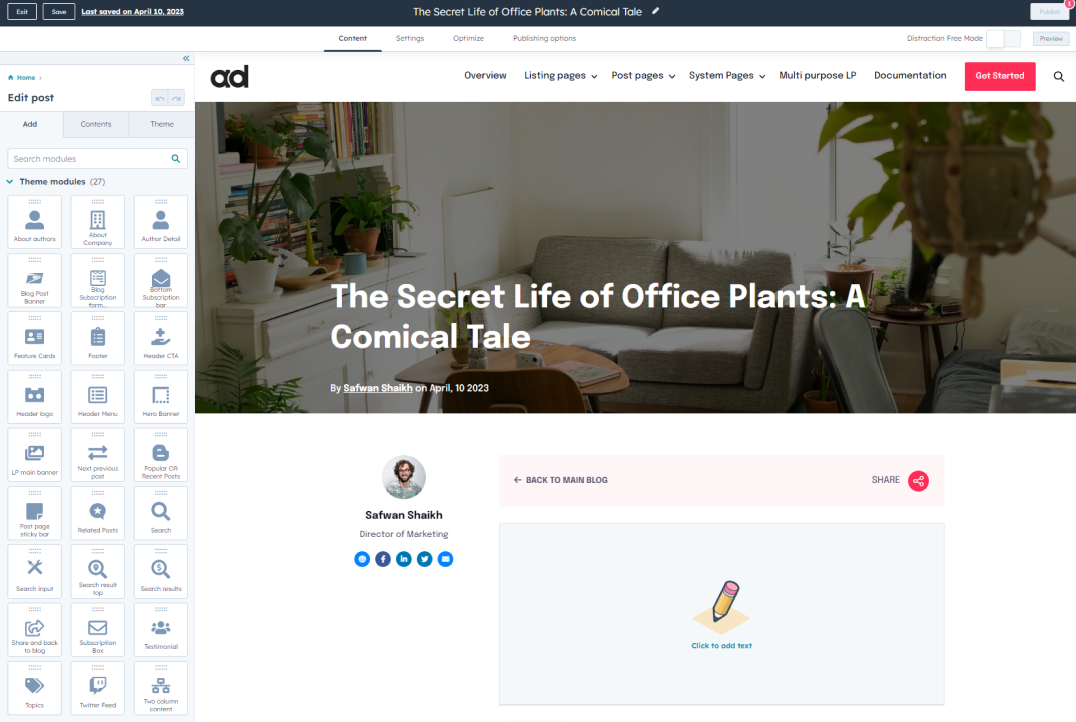
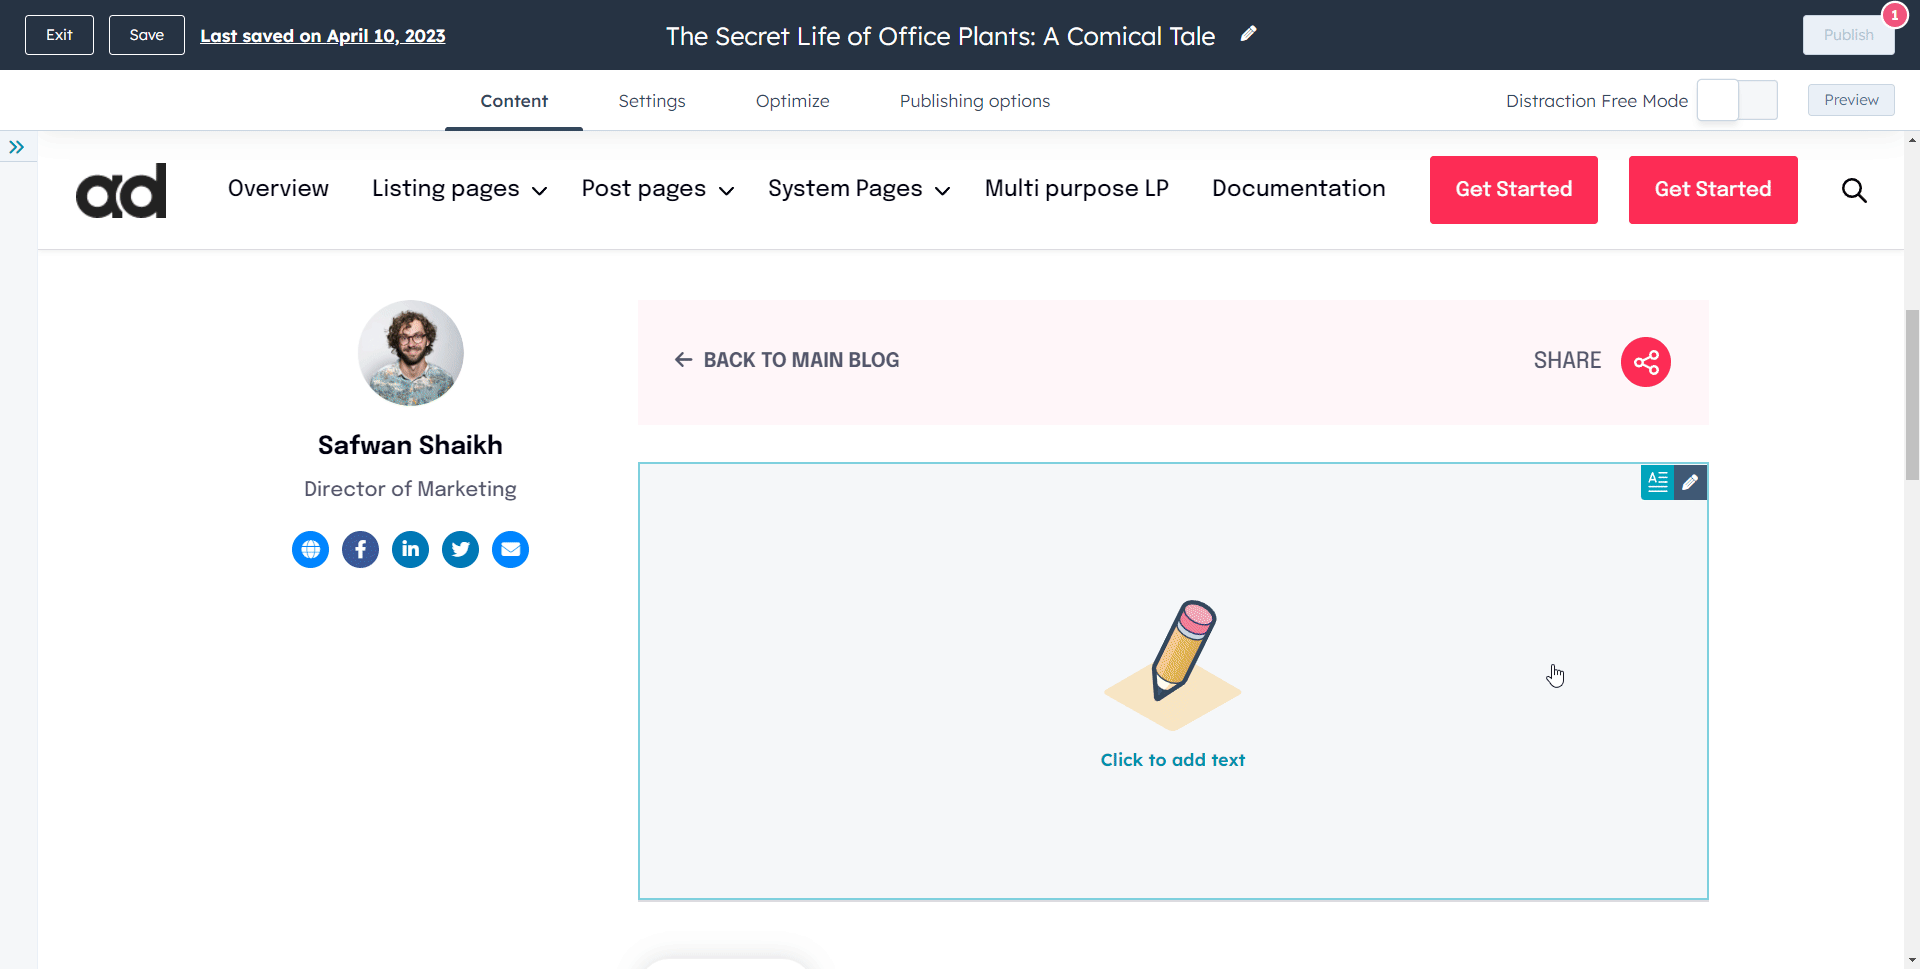
G) Click the content area to start writing or copy paste from anywhere
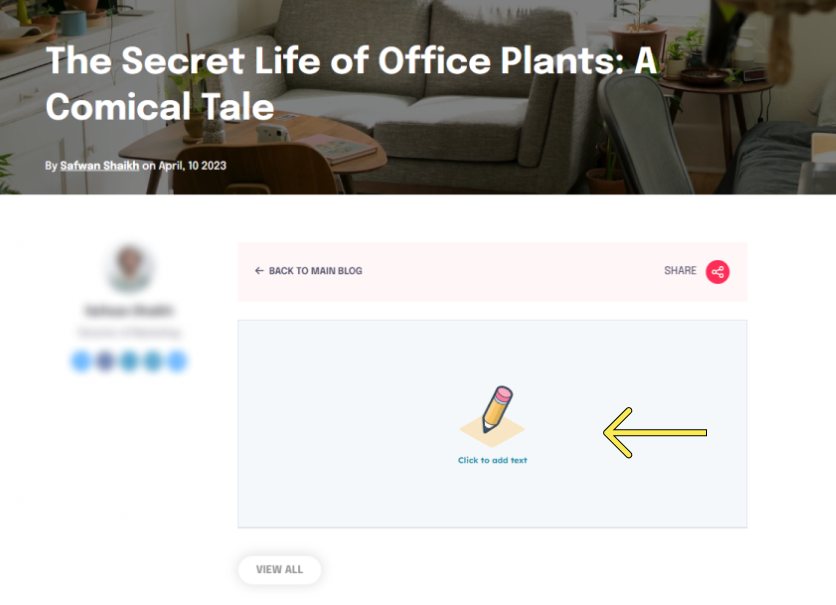
h) Or turn on the Distraction Free Mode and enjoy the distraction free writing.
i) Okay, time to publish! Hit the Publish button and see your blog page. Here's the blog we just published.
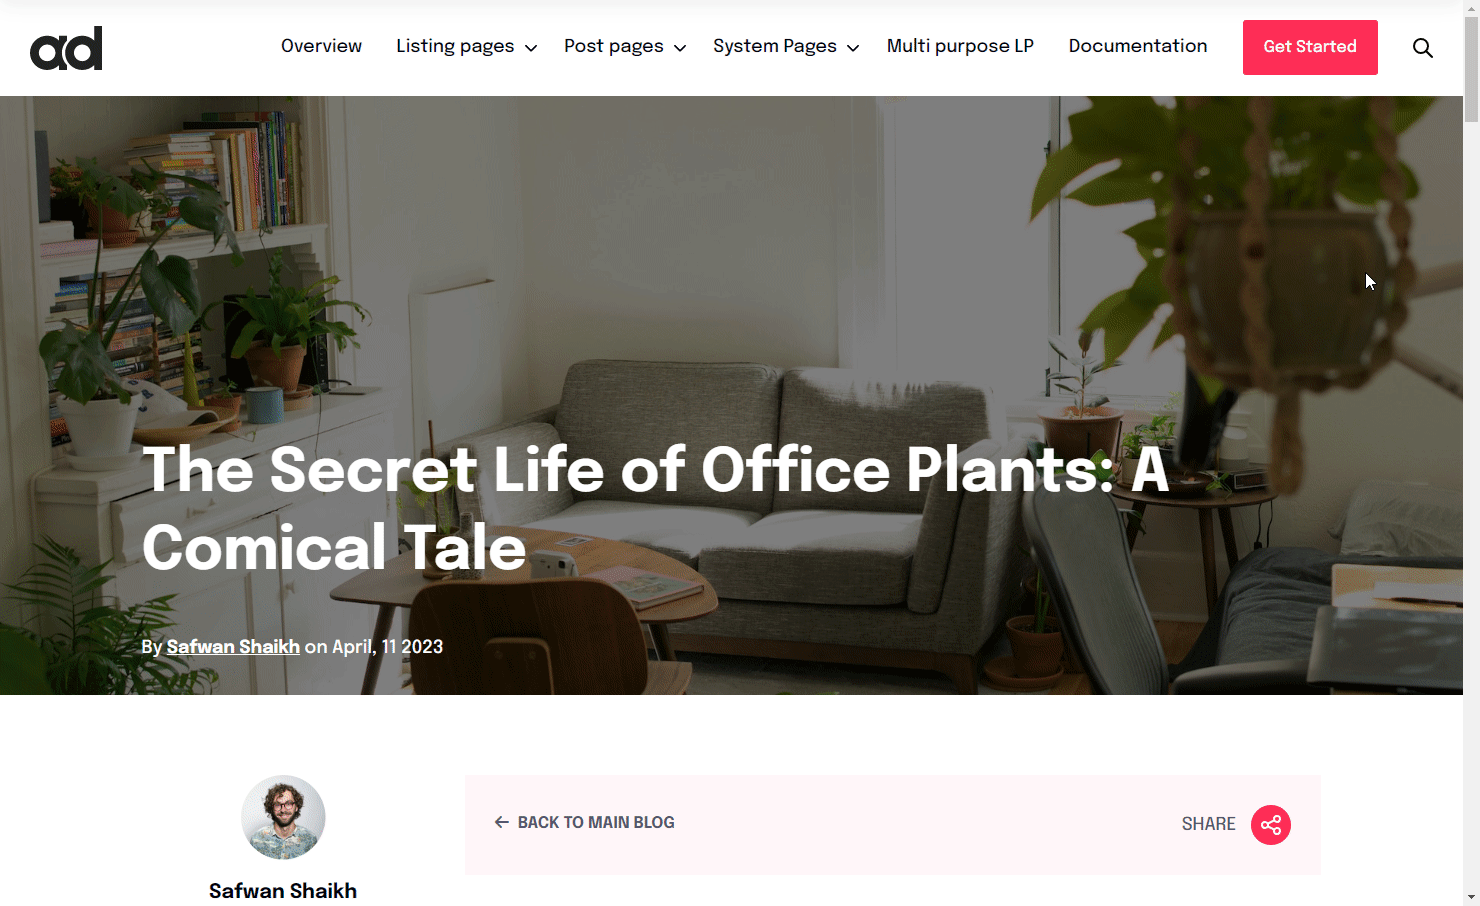
j) Let's view the listing page again to see how it looks there. Here it is, looking good.
Now continue publishing new blogs and see the new template transform!
Tip: Instead of creating a new blog every time, clone the recent post to carry forward all the details (Author, Tags)
For importing all your blog posts at once see this article.